Showing posts with label Back to School. Show all posts

Thursday, September 17, 2015

Clear Scraps: The Best Day

I had a layout up on the Clear Scraps blog this past Tuesday using one of the very cool Mirror Frames and the 6 Inch Circles Mascil.  Pink Paislee's Cedar Ridge is one of my favorite new collections!  


I first cut a rectangular piece of patterned paper to go behind the frame and then added epoxy words for my title. I also added a cute little fox die cut and acetate leaves!

Using my 6 inch Circles Mascil, I applied a light coat of modeling paste. Once dry, I adhered different sized circles to the centers.  

Showing some of the ephemera that comes with Cedar Ridge....

I love the multi colored leaf print!! So beautiful! Also, I layered more of the ephemera pieces as well as added a cute epoxy flower. 
Thanks for stopping by! Tell me your favorite fall collection this year?  
Have a great night! 


Sunday, September 13, 2015

Clear Scraps: 2 Cool 4 School

This week I had a layout up on the Clear Scraps blog using the Star Acrylic Border and Simple Stories' So Rad collection.  The border goes perfect with the star prints in the So Rad papers!  

I used alcohol ink to color my border...once dry I took a white paint pen to outline the edges. 

My title is a combination of American Craft Thickers and a chipboard accent from So Rad. Also, you can see one of the Bradz (which are self adhesive!).  

I adhered chipboard accents as well as added Bradz to the centers of random stars on my border. 


Check out all of the cool borders plus lots more at the Clear Scraps shop!  Have a wonderful day!

Tuesday, September 8, 2015

The Cut Shoppe: Back To School


Hello! Last week I had my first layout up for The Cut Shoppe Design Team!  I love playing with all of the fun cut files from Ashley's shop!  


I used the 8.5x11 Get To The Point background file as well as a title from School Rules.


I used Simple Stories' So Rad collection for my page....what an awesome boy line!  Love the colors!


I backed the arrows in the cut file with different patterned papers. Also showing one of the cute chipboard frame as well as coordinating die cuts! 


Check out The Cut Shoppe Etsy shop for these and many more fun files! Have a great day!  


Thursday, August 27, 2015

Clear Scraps: First Day


Hello everyone! Last week my kiddos went back to school. So today on the Clear Scraps blog I have a layout using the Wire Mixer and Echo Park's Teacher's Pet! I love love love the Mixers...you can use them as a stencil as well as an embellishment! 


I first placed my Mixer on my cardstock and used Dylusions Spray Ink in Sunshine Yellow.  I quickly cleaned it off so I could use it on my page.  My title is a cut file from the Silhouette shop called   


I added in some of the coordinating Teacher's Pet Element Stickers, as well as a wooden veneer star from Studio Calico and enamel shape from Teresa Collins. 

I used my hand punch to create a small banner at the top of my page with different patterns from the collection. I then stitched through using my sewing machine. 

Showing more of the coordinating stickers as well as a gold paper clip from 
Teresa Collins Studio Gold collection.  

This cute wooden veneer letter is from Freckled Fawn...I layered it on top of a Teacher's Pet label sticker.  

Thanks for stopping by today!  Check out all of the fun new product at Clear Scraps by clicking here! Have a wonderful day!

Thursday, August 22, 2013

Clear Scraps Back to School

As the kids get into the swing of their first week back at school, I have a tutorial on the  Clear Scraps blog featuring both a card and layout. 
First up is the Regular Send It Clear Card and Small Star Clear Shape. I embossed and used alcohol ink on both right and left flaps of the card. 
 
Next, I used a Faber Castell Gelato in Banana on the edges of the flaps. I applied the color directly to the edges and then used my finger to rub it in.
 
 
For the Star Clear Shape, I inked with Ranger Alcohol ink in Butterscotch, then added Viva Pearl in Silver around the edges.  I then added paper and embellishments to the front....


.....as well as the inside of the card. 

 
Next, for my layout, I used a Clear Scraps 12x12 Acrylic Sheet and the Memories Clear Expression Word Title. 


 I used the 6 inch Numbers Mascil and Ranger Alcohol ink in Slate for the upper left corner of my page. The Mascils are so fun to work with!
Please visit the Clear Scraps blog to see more photos of my tutorial! Thanks for stopping by! Have a wonderful day!


Thursday, August 1, 2013

Sketch N Scrap #38 reveal

It's the first of the month and that means time for another awesome sketch reveal from
Sketch N Scrap!  Today's sketch is designed by co-owner Lisa Hidy. Love working with these sketches!


And here is my layout! Since it's August I wanted to do a back to school themed. I used papers from my July Studio Calico kit.  Love these photos of my little guy on his first day of kindergarten!  So cute and sweet!  Hard to believe he's going to be a big 2nd grader in a couple weeks.

 
I used Jillbean Soup's Alphabeans in red for my title, then added some orange chevrons cut on my Silhouette.  The stamped sentiment is from the Amy Tangerine Ready Set Go collection.
 
 
Here, I used a journaling card from Chic Tags' Everyday collection and my electric typewriter.  I then added washi tape from Pebbles and stamped arrows from the 7gypsies Postale Clear Stamp set. And my flair is from {a flair for buttons}...loving the  cute little camera!

 
Instead of circles, I used cardstock stickers from Basic Grey's Hey You set then stitched through with my sewing machine.

 
Love the different layers on this sketch!  I used many different papers including Studio Calico, Simple Stories, and Amy Tangerine.

 
Thanks for checking out my layout...be sure to head over to Sketch N Scrap for more takes on this sketch!  The next sketch will be out on the 15th!  Have a great day!


Tuesday, September 25, 2012

Clear Scraps First Day of School layout

Hey everyone, just wanted to share this fun layout I did for the Clear Scraps design team!

As my background, I used a 12x12 Acrylic Sheet. I love this option as it adds a lot of flair to your project!


I used the Curiosity line from Authentique. Love the colors and the vintage feel of this collection!


I also added a Clear Shapes small acrylic star to my layout. I first used Glossy Accents along the edges and then applied the new Ranger Distress Dry Glitter. 


I added some finishing touches such as wooden veneers from Studio Calico and flair from {a flair for buttons}


That is all for now!  See everyone soon!


Wednesday, September 12, 2012

Fun Clear Scraps Teacher card

Happy Humpday! I am loving this weather..it's warm but you can definitely feel that fall is in the air!  I can't wait to decorate for fall and Halloween. Actually, if I would've had it my way decorations would've been up September 1st!  LOL But, my husband thinks it's too early.

Anyway, we are in the routine of school. Another reason why I love this time of year.  I love the routine and well...having the house to myself! Does that sound selfish? LOL 

As my first design team assignment for Clear Scraps, I made this card with the Send it Clear Belgrave card,   a Clear Shape small star and the Curiosity line from Authentique.  


If you haven't played with one of these cards, you need to!  Each Send It Clear card comes with clear adhesive circles to assemble the three pieces together. I love how it opens in the middle! 

For my card, I painted the Clear Shape star with gray chalkboard paint. My first intention was to write a sentiment on the star but I decided to embellish it instead.  


I applied two coats allowing an hour drying time in between.


After the paint was dry, I used a white paint pen to outline the edges.


Next, I added some of the cardstock stickers, as well as a mini wooden ruler by Maya Road and baker's twine by Whiskers Graphics. 


I covered the inside with paper as well, plus added a cardstock journaling sticker.


Be sure to stop by the Clear Scraps shop to check out these products and a lot more. You would be amazed on what you can do with acrylic and how you can add it to your projects!
Thanks for reading! -Jen


Tuesday, September 11, 2012

Back to School

Hi everyone! Sorry for my absence...even with the kiddos in school all day, its seems that I'm busy running errands all day. Plus, I've been trying to get into my scraproom to work on some projects!

Today I am sharing two projects I did for The Scrapbooking Studio design team using Graphic 45's An ABC Primer collection.  I love Graphic 45 but usually don't use it very often because honestly, I don't know how to use it. I don't think the vintage look is my thing..but I was happily surprised on how much I liked using this collection.

First up is a layout I did with a picture of my daughter on her first day of 2nd grade. I used  my Tim Holtz paper distresser on the edges of my patterned papers to give my layout a more vintage feel.


I loved the chipboard and die cut tags and used them to layer around my photo. I finished it off with a vintage button from Tim Holtz's Ideology collection.

 Here I used the Tim Holtz rosette die followed by a bingo piece from Maya Road. 


More Tim Holtz goodness!! I stamped "discover" on a small piece of paper and used of of the vintage plates. 


Next, here is a card that I created using the same line.  I used some of the patterned papers as well as the chipboard die cuts.  I also incorporated a tag from Jenni Bowlin, as well as cardstock circle stickers.
The photo holder is part of my stash...I've had them for so long I don't remember where I bought them. I'm sure we all have items like that in our supplies! LOL  I finished my card with some black and white baker's twine from Divine Twine.


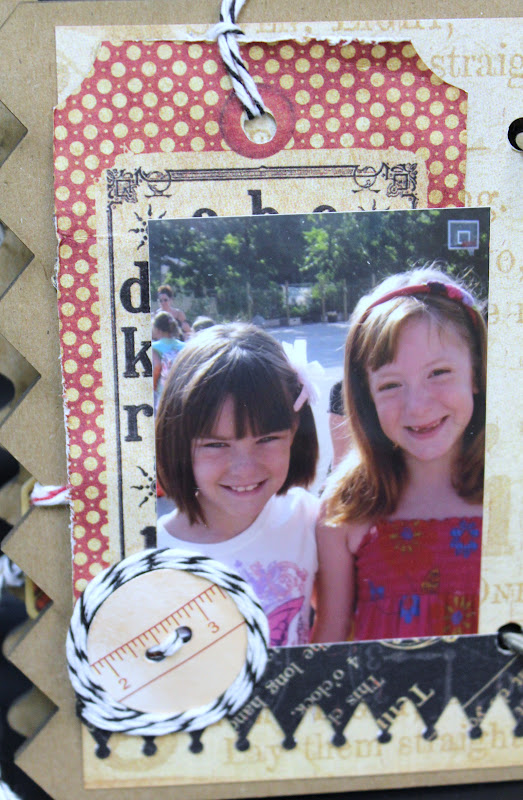
Lastly, I made a mini book using Wendy Vecchi's Art Parts as pages.  I inked the front cover using Dylusions Post Box Red. And I wanted my book to have lots of tags and baker's twine!  


I mixed in some more Jenni Bowlin...here I used a tag as well as a flash card sticker. 


Another Jenni Bowlin tag and I also used a tab above my picture.


Here, stamped a Jillibean Soup kraft coin envelope and added some Ideology pieces to it.  The stamp is one of Wendy Vecchi's!  


This time, I used a Jenni Bowlin tag as my background. Perfect for journaling!


One of the chipboard die cut frames that coordinate with the line.  


Just off to the right, you can see one of Maya Road's new kraft pennants!  Love these!!


Well, that is all for today! Hope this gave you some inspiration to scrap those back to school photos! 
Until next time, thanks for reading!