Showing posts with label Ranger. Show all posts

Thursday, August 2, 2018

Clear Scraps Heart Pallet Shape

Hello...I'm back! I don't know why I'm so bad at blogging but I am. I  guess I can partially blame it on the fact that I started a new job in April. I'm working part time as a merchandiser for American Greetings at our local Meijer. I  really like it because I'm getting to be around cards and stationary..kind of reminds me of when I  used to work at our local scrapbook stores.  

Today,  I'm sharing a recent project I created for the Clear Scraps design team.  New Wood Frames and Pallet Shapes were debuted at the show back in January and they are so fun to work with! Here, I    used the Heart Wood DIY Pallet Shape with a favorite photo of my kids. 


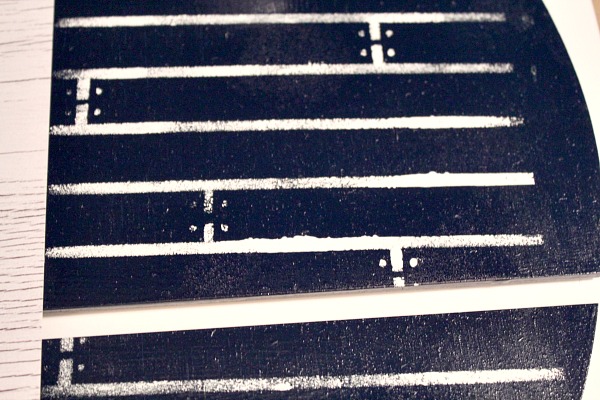
I   usually use chalk paint on the wood pieces because I love they way it looks. And I    had intended to do so on this piece, but the blue chalk paint I    had picked out was too light for my paper.  So, the next best thing is spray paint! Especially with these bigger pieces, its nice for faster coverage! After my paint was dry, I  wanted to add distress to my background. Using the 6 Inch Shiplap Mascil and white chalk paint, I  lightly dabbed paint to the front of the heart.  I  did not worry about clean lines and ensuring even coverage.  

Here is the end result after removing my Mascil! Again, it isn't perfect and that's ok! 
I  then used pieces from Cocoa Vanilla Studio's Wild At Heart collection as well as chipboard pieces from Clear Scraps.  I  painted the Cherish Chipboard Word Title with white chalk paint. Once dry, I    added a generous amount of Distress Crackle Paint in Clear Rock Candy to the surface.  
 I  used the same technique on one of the hearts from the Hearts Chipboard Embellishment Set and adhered to one of the frames from the Wild at Heart line.  
 You can see I  added some stenciling on this side of my photo as well. I    confess it did not turn out as well...the thing about mistakes is that they can usually be covered with sticker or some type of embellishments! LOL 


Thank you for stopping by! Check out Clear Scraps shop to see the new releases!  Have a great night!


Tuesday, February 20, 2018

Clear Scraps: #bestfriends

Hello..today I  have a layout with tutorial on the Clear Scraps blog!  I used the 6 Inch Diamond Heart Mascil as the background of my page and I'm going to show you my technique! 


Securing the Mascil to my cardstock with washi, I  picked three coordinating colors of Distress Ink/Oxide. I  applied using a foam applicator in a circular motion allowing the colors to blend. 
Next, I  created holes in the cardstock to stitch embroidery floss around the outside and "blank spaces" of the heart.  

Here is the final result! I  love how it turned out!  

Next, I  used pieces from Pebbles' Girl Squad line to embellish my page; such a fun collection!  


Thanks for stopping by!  You can check out the large variety of Mascils by clicking HERE! Have a great day!


Tuesday, February 6, 2018

Clear Scraps February Tag

Today I'm sharing my Clear Scraps tag for this month! I  always adore Valentine theme scrapbook papers and embellishments!  I  began with covering my chipboard tag with this beautiful ombre pink patterned from Pebbles' Forever My Always  collection.  I  set it to the side to add some bling to my Arrow Heart Chipboard Embellishment from Clear Scraps! 


I    knew I  wanted to use a red embossing powder so I  used a cardinal red as my base color. 

Once my paint was dry, I  covered the chipboard with ample amount of embossing ink and added my red glitter embossing powder.  I  then set using my heat gun  


I    layered coordinating stickers and die cuts from the collection before adhering my Arrow Heart with Beacon 3-in-1 Adhesive.  Using a pop dot, I    added a cute ampersand sticker to the front right.  

Thank you for stopping by today!  Lots of great new products are in the Clear Scraps shop!  Also, check out the blog for more inspiration from the design team! Speaking of design team, Clear Scraps is looking to add designers...if you love working with all types of crafts, this team is for you!   Details can be found HERE


Sunday, June 11, 2017

Clear Scraps: Star Chipboard Embellishments Layout


Hello and happy Sunday!   I know its been forever since I've blogged.  I can't seem to keep up with anything lately...honestly, things have been kind of rough so anything extra is getting pushed to the wayside.  Anyway, I wanted to share a fun layout I did for Clear Scraps using the new Star Chipboard Embellishments.  


I started with one of the XL Deco Shapes and colored the outside edges in Mermaid with Ranger Alcohol Ink.  Using a solvent based ink/medium is your best bet because the acrylic is a non-porous surface.  The alcohol ink won't run or smear and "adheres" to the acrylic quickly. 

Here you can see a close up of the alcohol ink on the acrylic! 

I colored my chipboard pieces using Distress Paint in Cracked Pistachio and set them aside to dry.  

For my layout, I used Shimelle's new collection Little by Little! I knew I wanted to get my hangs on it when I saw it at the show in January!  

The stars make great accents on my page along with the patterns papers and extra embellishments!  


Thanks for stopping by!  Check out all of Clear Scraps fun products by visiting their online shop! Have a great night!


Wednesday, February 15, 2017

LOVE Expressions XL Clear Word Title

Hello! I'm trying to blog more of my projects this week. Both kiddos are currently home sick with the flu and I'm still not feeling that great.  Spring needs to get here pronto.  And I'm going to Lysol-bomb the house tomorrow!  

This week I was up on the Clear Scraps blog with the LOVE Expressions XL Clear Word Title. I'm going to show you an easy way to give your acrylic a marbled look (which is so in right now).  


Now, the best and easiest way to color your acrylic is with alcohol inks. After removing the protective film from both sides of the word, I flipped OVER the word and applied  Ranger Alcohol Ink in Watermelon.  Why color on the backside of the acrylic? This is so that if you add any paint or additional medium to the front of your project, the color will not bleed.   


So confession time: I had planned on using some distress paint on the front of my heart..but it so did not work out. I used non-acetone polish remover to take off the paint and accidentally removed some of my red alcohol ink which created some "gaps" in the overall coloring on the back.  So, I grabbed two more coordinating colors of alcohol inks and directly applied in small drop allowing the colors to spread.  I also used a paper towel to dab any extra ink...I love how it turned out!  

I wanted to add one of the Dragonfly Chipboard Embellishments to my heart. The easiest way to color is to add acrylic paint...here I used a few coats of Distress Paint in Cracked Pistachio.  
Once the paint was dry, I applied the chipboard directly to my Versa Mark pad and sprinkled with embossing powder that has bits of glitter embedded.  I removed the excess powder and set with my heat gun. 

The remainder of the letters I covered with patterned paper using Beacon Adhesive 3-in-1 Craft Glue.   We highly recommend a water based liquid adhesive so it doesn't yellow the acrylic...plus Beacon is just plain awesome!  I cut away excess paper with scissors and an exacto knife..and a little bit of sanding helps too! I followed by adding some fun embellishments from collection I used: Crate Paper's Hello Love.


Monday, February 22, 2016

Clear Scraps: Explore

Last week, I had a layout and tutorial up on the Clear Scraps blog using the new
Helm and Anchor Chipboard Embellishments.  I thought this set would go great with this cute photo of my nephew and October Afternoon's Treasure Map! 


I'm going to show you how I altered my chipboard pieces!  First, I applied a couple layers of white acrylic paint to each piece. 

I've had this ombre ink from Hero Arts since October and have been wanting to use it!  I thought the teal color would go well with my paper line. 


After allowing the acrylic paint to dry, I turned the pieces over and lightly applied directly to the ink pad.  

Once dry, I used Ranger Distress Crackle Paint in Clear Rock Candy. 


To give texture to my anchor, I used one of my roller stamps from American Crafts and did some "messy" stamping....I love how it turned out! 

For my title, I used wood grain Chipboard letters from October Afternoon, as well as added flair and stickers from Treasure Map. I also added wooden veneer stars from Studio Calico (love these!). 

I adhered some of the Sew Fun Banners on top of a Border and Label Stickers then stitched through. 

Thanks for reading...you can visit the Clear Scraps shop to see these and the many new products!
Have a great day!


Wednesday, April 22, 2015

Clear Scraps and Pion Designs


Hello! This week the Clear Scraps design team is pairing up with Pion Designs!  For my project, I altered the new Small Regular Portrait Clipboard with Pion Designs' Vintage Wedding and From Grandma's Attic Vintage Cut Outs.  


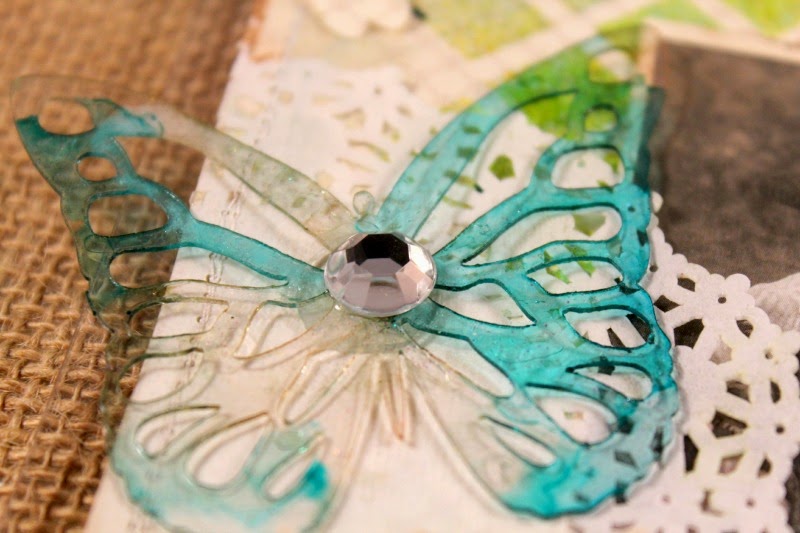
I used one of the Butterfly Mixers to accent my clipboard and affixed a jewel in the center. 


To color my butterfly, I used two different colors of Ranger Alcohol Ink. You can apply with either an applicator or by dripping directly onto the acrylic. 

To give my butterfly some sparkle, I added some Tattered Angels Glimmer Glam after the alcohol ink was dry. 

Here is a close up of my background I created with the 6 inch Diamonds Mascil.

 Here is how I created my background! First, I secured my Mascil to my paper using washi tape. I then applied a thin layer of modeling paste. 

Keeping the Mascil in place, I lightly sprayed with spray inks. Feel free to experiment and use multiple colors!  


Here is my end result!  

I also used spray ink some old Maya Road chipboard letters I had in my stash!  


For bonus, I created a card too using the Heart Send It Clear Card!  


I colored one of the birds from the Clearly Accent Bird and Cage Embellishments with Ranger Alcohol ink.  

For my background, I used the 6 inch Damask Mascil with modeling paste.  


My stamped sentiment is from the Technique Tuesday Studio AE stamp set "Loving Words".  

Thanks for stopping by! There is lots of inspiration all week at the Clear Scraps blog! Also, visit the Clear Scraps shop for these products and a lot more! Have a great day!