Showing posts with label Mascil. Show all posts

Sunday, January 1, 2023

Winter Acrylic Mini Album


Hello! It's been a minute or two since I last blogged!  Today I'm sharing a mini album I created for Clear Scraps using the 5x7 Acrylic Tab Album!  It's all about winter (which I'm not a huge fan of) but I do love creating projects about winter and snow! Weird I  know! LOL

For the front of my album, I used the Star Tree Chipboard Embellishment Shape which I first painted with white acrylic paint.  I then added embossing ink to the bottom 2/3rds and top ring.  Using a fun blue glitter embossing powder, I set with my heat gun.  I then added strips of patterned paper to the bare spot in the chipboard. 

The front cover of the album is acrylic and I wanted to add some sparkle to the page.  Using the 6 Inch Ice Crystal Snowflake Mascil and StazOn Opaque, I lightly daubed my ink onto the acrylic as shown. 


Here is a close up of the front cover! I adhered my chipboard using my Beacon 3-in-1 Adhesive. 


For this page, I created a fun pocket in which I  added a journaling element to slide behind my photo. 


Here, I used my washi tape and stitched threw at the top of my journaling card  to create an interactive element. 


I love to create waterfalls to add additional space for photos or journaling!  Here, I used 4x4 sized pictures with cardstock. 


On the backside, I created another pocket that holds journaling elements from the collection I used. 


Another way to add additional space is to use a score tool and create a flap(s). 


You can see how mine opens to show two more photos ! 


Thank you for reading today! Hope this inspires you to do some creating with Clear Scraps Mini Albums! Have a great day!  

Thursday, August 2, 2018

Clear Scraps Heart Pallet Shape

Hello...I'm back! I don't know why I'm so bad at blogging but I am. I  guess I can partially blame it on the fact that I started a new job in April. I'm working part time as a merchandiser for American Greetings at our local Meijer. I  really like it because I'm getting to be around cards and stationary..kind of reminds me of when I  used to work at our local scrapbook stores.  

Today,  I'm sharing a recent project I created for the Clear Scraps design team.  New Wood Frames and Pallet Shapes were debuted at the show back in January and they are so fun to work with! Here, I    used the Heart Wood DIY Pallet Shape with a favorite photo of my kids. 


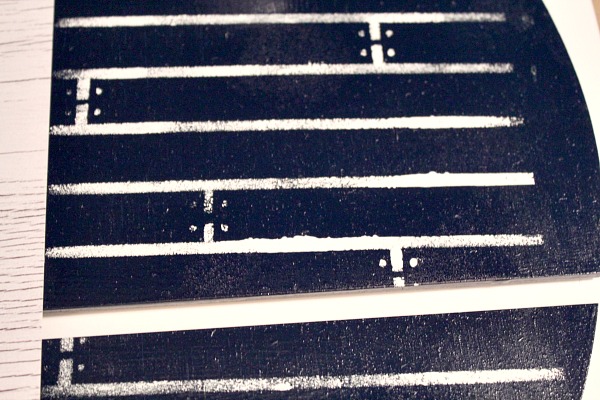
I   usually use chalk paint on the wood pieces because I love they way it looks. And I    had intended to do so on this piece, but the blue chalk paint I    had picked out was too light for my paper.  So, the next best thing is spray paint! Especially with these bigger pieces, its nice for faster coverage! After my paint was dry, I  wanted to add distress to my background. Using the 6 Inch Shiplap Mascil and white chalk paint, I  lightly dabbed paint to the front of the heart.  I  did not worry about clean lines and ensuring even coverage.  

Here is the end result after removing my Mascil! Again, it isn't perfect and that's ok! 
I  then used pieces from Cocoa Vanilla Studio's Wild At Heart collection as well as chipboard pieces from Clear Scraps.  I  painted the Cherish Chipboard Word Title with white chalk paint. Once dry, I    added a generous amount of Distress Crackle Paint in Clear Rock Candy to the surface.  
 I  used the same technique on one of the hearts from the Hearts Chipboard Embellishment Set and adhered to one of the frames from the Wild at Heart line.  
 You can see I  added some stenciling on this side of my photo as well. I    confess it did not turn out as well...the thing about mistakes is that they can usually be covered with sticker or some type of embellishments! LOL 


Thank you for stopping by! Check out Clear Scraps shop to see the new releases!  Have a great night!


Tuesday, February 20, 2018

Clear Scraps: #bestfriends

Hello..today I  have a layout with tutorial on the Clear Scraps blog!  I used the 6 Inch Diamond Heart Mascil as the background of my page and I'm going to show you my technique! 


Securing the Mascil to my cardstock with washi, I  picked three coordinating colors of Distress Ink/Oxide. I  applied using a foam applicator in a circular motion allowing the colors to blend. 
Next, I  created holes in the cardstock to stitch embroidery floss around the outside and "blank spaces" of the heart.  

Here is the final result! I  love how it turned out!  

Next, I  used pieces from Pebbles' Girl Squad line to embellish my page; such a fun collection!  


Thanks for stopping by!  You can check out the large variety of Mascils by clicking HERE! Have a great day!