Showing posts with label Crate Paper. Show all posts

Wednesday, February 28, 2018

Clear Scraps Acrylic Card Tutorial

Hello friends...hope you are having a good week! It seems to be going fast and I   can't believe tomorrow is March 1st!  Yesterday on the Clear Scraps blog I  shared a video tutorial on a fun technique coloring stamped images on acrylic!  I  recently started a YouTube channel so bare with me since I'm new at this!  Doing videos is something I've been wanting to do for a long time.

Here is my first card! I  used the 12x12 Acrylic Sheets cut down to approximately 4x5 inches.  A solvent based ink is always recommended as it will dry quickly and will not smear.  I  used StazOn in black with a fun Dina Wakley stamp set.  


Once my stamped images were dry, I  flipped over my acrylic to start painting with my Zig Paint Pens.  


Here is my video demonstrating the technique!  


Thanks for stopping by! I    hope to have more videos posted soon! Have a great night! 

Tuesday, February 13, 2018

Clear Scraps You & Me Birch Wood Frame

Hello! Today on the Clear Scraps blog I  have one of the new Birch Wood Frames that were debuted at Creativation last month! I'm always amazed on the ideas Susan has and these Wood Frames don't disappoint!  I  used the You & Me Birch Wood Frame which holds a horizontal 4x6 photo.  

I    started by painting the frame in dark grey but it looked too flat to me. So, I    decided to try a technique Susan had taught me at the show! After my grey paint was dry, I    used an old candle to rub wax onto the surface of the frame. I    then applied white chalk paint in sections using a spatula to  scrape off the paint before it dries. Your end result is a distressed look with the grey showing through the white.  I    did go in and add a little more white chalk paint to cover some of my scrape marks. Its definitely a learning curve! 

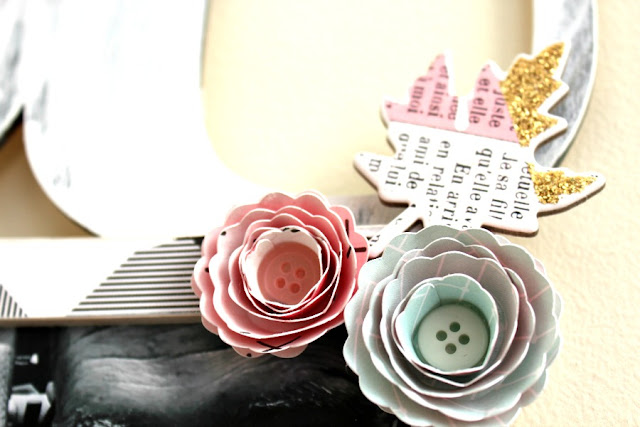
I    covered the frame portion with a black plaid print and adhere with my Beacon 3-in-1 Adhesive.  Taking different patterns, I  cut these rolled flowers by Paige Evans found in the Silhouette shop! I    adhered buttons from my stash to some of the centers as well as added chipboard leaves.

I  finished by using my hot glue gun to adhere ribbon to the top of the frame as well as added a bow!  I  love how it turned out!  
Thanks for looking! Check out the new Clear Scraps products by clicking HERE!
Have a great day!


Tuesday, April 11, 2017

Crate Paper: Cool Kid


Hello!  I'm back to share some layouts I created at a crop in December with Crate Paper's Cool Kid collection. I always appreciate a good boy line since they can be tough to find!  Crate Paper knocked one out of the park with this one!  I'm definitely trying to hoard as much of this as I can LOL  My sister always gives me great photos of my adorable nephew so its fun to scrapbook pages for her! 

For my first layout, I started with kraft cardstock as my background. I like to layer my patterned papers so I added pieces behind my photos.  

I used the cute frame from the 12x12 Chipboard Sheet to accent my journaling on one of the coordinating stickers. 

Love the black block letter stickers found on the 6x12 Sticker Sheet!  


I really love ledger print so I wanted it to be a main part of my background.  I paired this with the fun gray star print on the opposite side!
Here I used the block chipboard letters for my title....I also a few of the die cuts and stickers from the collection.  

I used my Fiskars pennant punch to add a cute banner in the corner....I finished by stitching though the top.  

Thanks for looking...sorry I haven't blogged in so long.  My son has been battling mono since the end of February. And honestly, I have been in sort of a funk and haven't felt much like crafting.  Lots of stuff going on in my personal life right now. 


Wednesday, February 15, 2017

LOVE Expressions XL Clear Word Title

Hello! I'm trying to blog more of my projects this week. Both kiddos are currently home sick with the flu and I'm still not feeling that great.  Spring needs to get here pronto.  And I'm going to Lysol-bomb the house tomorrow!  

This week I was up on the Clear Scraps blog with the LOVE Expressions XL Clear Word Title. I'm going to show you an easy way to give your acrylic a marbled look (which is so in right now).  


Now, the best and easiest way to color your acrylic is with alcohol inks. After removing the protective film from both sides of the word, I flipped OVER the word and applied  Ranger Alcohol Ink in Watermelon.  Why color on the backside of the acrylic? This is so that if you add any paint or additional medium to the front of your project, the color will not bleed.   


So confession time: I had planned on using some distress paint on the front of my heart..but it so did not work out. I used non-acetone polish remover to take off the paint and accidentally removed some of my red alcohol ink which created some "gaps" in the overall coloring on the back.  So, I grabbed two more coordinating colors of alcohol inks and directly applied in small drop allowing the colors to spread.  I also used a paper towel to dab any extra ink...I love how it turned out!  

I wanted to add one of the Dragonfly Chipboard Embellishments to my heart. The easiest way to color is to add acrylic paint...here I used a few coats of Distress Paint in Cracked Pistachio.  
Once the paint was dry, I applied the chipboard directly to my Versa Mark pad and sprinkled with embossing powder that has bits of glitter embedded.  I removed the excess powder and set with my heat gun. 

The remainder of the letters I covered with patterned paper using Beacon Adhesive 3-in-1 Craft Glue.   We highly recommend a water based liquid adhesive so it doesn't yellow the acrylic...plus Beacon is just plain awesome!  I cut away excess paper with scissors and an exacto knife..and a little bit of sanding helps too! I followed by adding some fun embellishments from collection I used: Crate Paper's Hello Love.


Thursday, November 17, 2016

First Day with Maggie Holmes' Gather

Hello...I'm not sure where the last few weeks have gone. All I know is that I've been busy and haven't had enough time to scrap.  Now that the weather is turning more fall-like maybe I'll get a chance to do some creating.

Today, I'm sharing a layout I created just for myself! I used a sketch from Creative Scrappers and Maggie Holmes' Gather collection. I am a big fan of Kristine's sketches and have been wanting to play along for some time.  So, here is the sketch:


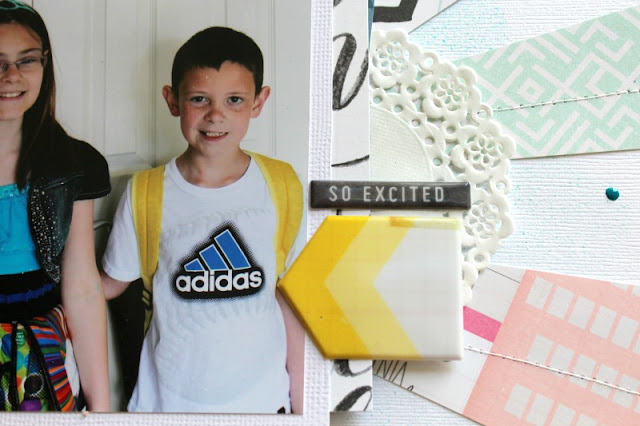
And here is my layout! I scrapped some photos of my daughter on her first day of school this year! I can't believe she is in 8th grade!  Last year of junior high!  


I love grid layouts...they are fun and easy!  I used different patterns from Gather for my squares...but mixed it up a bit so I could add the vertical photo of my daughter.  


How cute are these ribbon embellishments?  I love the colors of this collection! 


Thanks for looking! Be sure to check out the Creative Scrappers blog to see more great sketches! 


Friday, June 3, 2016

Clear Scraps: Dreaming of Sunshine Layout

Hello...so happy its Friday!  Today, our family adopted two kittens and we've been busy playing and cuddling!  This past spring, we lost our sweet Sadie who was almost 16...I think my husband wanted to be cat-less for awhile but I kept begging LOL So, for Mother's Day he surprised me with a note saying that I could have one kitten after we got back from our vacation in August.  So, somehow we adopted two kittens in June! LOL


Today, I'm sharing a layout I have up on the Clear Scraps blog using the Chipboard Butterfly Embellishment and 12 Inch Cloud Mascil. 


I started first with white card stock and my 12 Inch Cloud Mascil.  Using Heidi Swapp Color Shine, I lightly sprayed my background.  You can use as much or little as you prefer!  Don't be afraid to experiment with the ink...and it doesn't have to be perfect!


I added in some enamel dots and a cute wood veneer heart from my stash to accent the clouds. 

I also used some of the epoxy stickers from Maggie Holmes' Bloom collection as well as adhered a doily behind my photo.  I used strips of different patterns to create my own sunshine rays and stitched through with my sewing machine. 

My title is also from the Bloom Epoxy Sticker Sheet!  

A close up of my butterfly...I'm going to show you how a simple way to embellish your chipboard! 

I first applied a light coat of white acrylic paint to the surface and allowed to dry.


Next, I covered the painted surface with clear embossing ink (turning the pad upside down and applying directly works best!).   Then using embossing enamel I applied an ample amount to the chipboard.  I tapped the chipboard on my craft sheet a few times to remove the excess powder and applied heat. The one thing I love about the embossing enamel is that it has bits of metal that melt!  It creates a beautiful effect!  

Thanks for stopping by! Check out the Clear Scraps shop to see the huge selection of chipboard shapes as well as Mascils!


Wednesday, February 10, 2016

The Cut Shoppe: Feel The Love Blog Hop

Welcome to The Cut Shoppe's Feel The Love Blog Hop!  If you are following the blog roll, you've come from Allie's blog!  Be sure to comment on each DT member's blog to be entered to win 14 FREE cut files from the shop!  I will be giving away a cut file as well...winners will be announced February 16th!  


I cut the "love is always a good idea" sentiment from my wood grain pattern and backed with a lighter pattern. I love the way it turned out! 

Showing some of the stickers from the Bloom collection that I layered at the top of my page. 


More of the ephemera from the collection!  


Thank you for hopping with us! I hope this inspires you to do some creating with a cut file or two from The Cut Shoppe!  Now through the end of the hop use code LOVEYOU30 for a 30% discount on your purchase!


Leave me a comment and I'll be giving away the "Love Letters" cut file to a lucky participant!  


Thanks and good luck!!  Next, on the list is is the very talented Missy!