Showing posts with label Farmhouse Paper. Show all posts

Thursday, September 18, 2014

Paper Secrets September 15th Sketch Reveal

Hi friends...September is moving right along!  This week Paper Secrets revealed their second September sketch!  This sketch's challenge word is APPLE.
 
 
For my layout, I used Farmhouse Paper's 309 collection. My challenge word items are:  A-arrow  P-punch (pennants) P-pin L-letters E-enamel dots.
 
My gold glitter letters are the new Shimelle American Craft Thickers. I love using these on my pages!


I used a hand punch to create these pennants under my photo. I then stitched through with my sewing machine and added a cute chipboard pin from the 309 collection.  
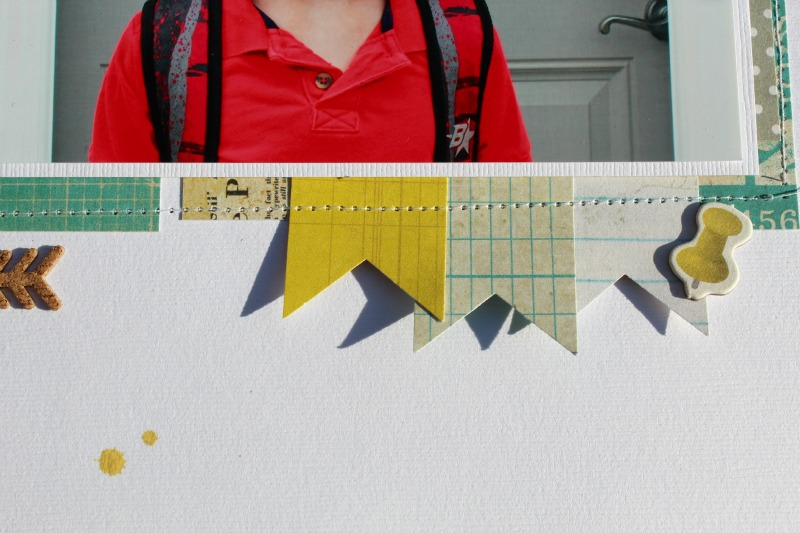

The cork arrow is from Studio Calico (also from the Paper Secrets shop!)  The date stamp is also Studio Calico! I added some enamel dots from my stash!


Don't forget to link up your own layout for a chance to win a Paper Secrets GC to the shop!  Have a great day!


Tuesday, February 18, 2014

Paper Secrets February 15th Sketch Reveal

Hello! It's the middle of the month so that means another sketch reveal from Paper Secrets!  The challenge word is LOVE!  This sketch was so fun to work with!


And here is my layout! I used Farmhouse Paper's 302 collection (which can be found in the Paper Secrets shop!)  I've had this paper for awhile...I always thought it was a great school line, but  as you can see, it can be used for so many themes! 
 
For the challenge word I used L-lined paper, O-orange, V-vellum, and E-envelope. 
 
Love these chipboard glasses...I adhered vellum behind them. My title is made from letter stickers from Basic Grey and American Craft Thickers. 

I also added a vellum pennant as well to this cluster.  For smaller pennants, I use my square hand punch to create the notch. Works great!

I added a couple orange buttons to break up the many shades of blue. Plus, I think it helps the orange typewriters on the envelope to "pop".

Here is the envelope, which I added a button and bakers twine, as well as one of the number clips that come with the 302 collection.

Another button and of course, enamel dots! Love using them! 
 
Link up your own layout for a chance to win a gift card to the Paper Secrets shop!  New items are rolling in from the show!  :)  Thanks for stopping by!


Thursday, August 22, 2013

Clear Scraps Back to School

As the kids get into the swing of their first week back at school, I have a tutorial on the  Clear Scraps blog featuring both a card and layout. 
First up is the Regular Send It Clear Card and Small Star Clear Shape. I embossed and used alcohol ink on both right and left flaps of the card. 
 
Next, I used a Faber Castell Gelato in Banana on the edges of the flaps. I applied the color directly to the edges and then used my finger to rub it in.
 
 
For the Star Clear Shape, I inked with Ranger Alcohol ink in Butterscotch, then added Viva Pearl in Silver around the edges.  I then added paper and embellishments to the front....


.....as well as the inside of the card. 

 
Next, for my layout, I used a Clear Scraps 12x12 Acrylic Sheet and the Memories Clear Expression Word Title. 


 I used the 6 inch Numbers Mascil and Ranger Alcohol ink in Slate for the upper left corner of my page. The Mascils are so fun to work with!
Please visit the Clear Scraps blog to see more photos of my tutorial! Thanks for stopping by! Have a wonderful day!