Showing posts with label Beacon Adhesives. Show all posts

Monday, January 2, 2023

Snowflake Shiplap Shape Home Decor


Hello friends! I'm on the Clear Scraps blog today with a home decor project using some of the new Shiplap Shapes! And I'm going to show you my techniques!  This is a really easy projet to recreate! 


Starting with the Small Circle and Square Shiplap Shapes, I applied a light coat of light blue chalk paint to each. I did not worry about whether I had full coverage and if the wood showed through my paint. 


Once my paint was dry, I used a tea light candle to rub wax onto the surface of the wood.   The rule is the more wax, the more distressed your end result will be. 


I applied white acrylic paint in sections then scraping in one direction before drying. 


Repeat these steps until you have covered your entire Shiplap Shape. 


I set aside my Shiplap to work on my Snowflake Mini Shaker Shape.  Again using the white acrylic paint, I  painted the top frame, as well as the edges of the inside frames and the chipboard base. 


Using my  Beacon 3-in-1 Adhesive, I affixed the two center frames. I then used a circle punch to place patterned paper in the center as shown.  


Now my shaker is ready for some fun chunky glitter which I added to the center.  


The next step is the acrylic overlay followed by the top chipboard frame! 


Now I am ready to assemble my pieces. I layered patterned paper underneath my photo as well as used a coordinating chipboard frame from the collection I used.  I punched a hole at the top of the Circle so I  could string ribbon through later. 


 I  also punched another hole at the bottom of my circle ensuring it lines up with the top. 


I applied my Snowflake Shaker to the Square Shiplap using my Beacon Adhesive (which I find works best with Clear Scraps products!) 


Thank you for reading!  Check out Clear Scraps shop to see what is new as well as see all of the Shiplap Shapes! Have a great day!  


Thursday, August 2, 2018

Clear Scraps Heart Pallet Shape

Hello...I'm back! I don't know why I'm so bad at blogging but I am. I  guess I can partially blame it on the fact that I started a new job in April. I'm working part time as a merchandiser for American Greetings at our local Meijer. I  really like it because I'm getting to be around cards and stationary..kind of reminds me of when I  used to work at our local scrapbook stores.  

Today,  I'm sharing a recent project I created for the Clear Scraps design team.  New Wood Frames and Pallet Shapes were debuted at the show back in January and they are so fun to work with! Here, I    used the Heart Wood DIY Pallet Shape with a favorite photo of my kids. 


I   usually use chalk paint on the wood pieces because I love they way it looks. And I    had intended to do so on this piece, but the blue chalk paint I    had picked out was too light for my paper.  So, the next best thing is spray paint! Especially with these bigger pieces, its nice for faster coverage! After my paint was dry, I  wanted to add distress to my background. Using the 6 Inch Shiplap Mascil and white chalk paint, I  lightly dabbed paint to the front of the heart.  I  did not worry about clean lines and ensuring even coverage.  

Here is the end result after removing my Mascil! Again, it isn't perfect and that's ok! 
I  then used pieces from Cocoa Vanilla Studio's Wild At Heart collection as well as chipboard pieces from Clear Scraps.  I  painted the Cherish Chipboard Word Title with white chalk paint. Once dry, I    added a generous amount of Distress Crackle Paint in Clear Rock Candy to the surface.  
 I  used the same technique on one of the hearts from the Hearts Chipboard Embellishment Set and adhered to one of the frames from the Wild at Heart line.  
 You can see I  added some stenciling on this side of my photo as well. I    confess it did not turn out as well...the thing about mistakes is that they can usually be covered with sticker or some type of embellishments! LOL 


Thank you for stopping by! Check out Clear Scraps shop to see the new releases!  Have a great night!


Tuesday, February 6, 2018

Clear Scraps February Tag

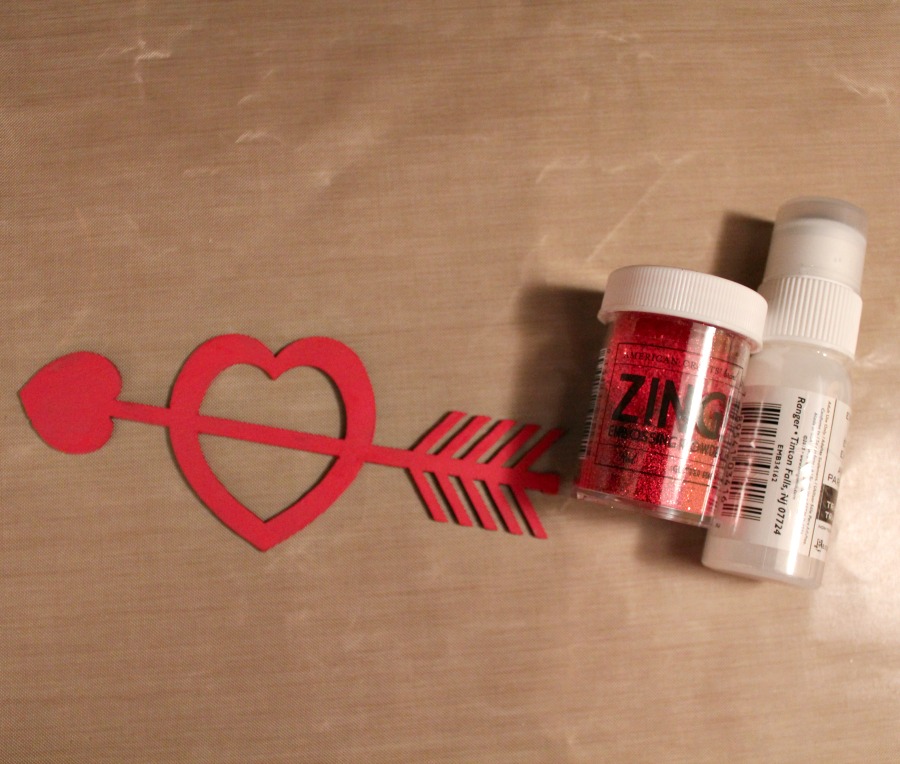
Today I'm sharing my Clear Scraps tag for this month! I  always adore Valentine theme scrapbook papers and embellishments!  I  began with covering my chipboard tag with this beautiful ombre pink patterned from Pebbles' Forever My Always  collection.  I  set it to the side to add some bling to my Arrow Heart Chipboard Embellishment from Clear Scraps! 


I    knew I  wanted to use a red embossing powder so I  used a cardinal red as my base color. 

Once my paint was dry, I  covered the chipboard with ample amount of embossing ink and added my red glitter embossing powder.  I  then set using my heat gun  


I    layered coordinating stickers and die cuts from the collection before adhering my Arrow Heart with Beacon 3-in-1 Adhesive.  Using a pop dot, I    added a cute ampersand sticker to the front right.  

Thank you for stopping by today!  Lots of great new products are in the Clear Scraps shop!  Also, check out the blog for more inspiration from the design team! Speaking of design team, Clear Scraps is looking to add designers...if you love working with all types of crafts, this team is for you!   Details can be found HERE


Wednesday, February 15, 2017

LOVE Expressions XL Clear Word Title

Hello! I'm trying to blog more of my projects this week. Both kiddos are currently home sick with the flu and I'm still not feeling that great.  Spring needs to get here pronto.  And I'm going to Lysol-bomb the house tomorrow!  

This week I was up on the Clear Scraps blog with the LOVE Expressions XL Clear Word Title. I'm going to show you an easy way to give your acrylic a marbled look (which is so in right now).  


Now, the best and easiest way to color your acrylic is with alcohol inks. After removing the protective film from both sides of the word, I flipped OVER the word and applied  Ranger Alcohol Ink in Watermelon.  Why color on the backside of the acrylic? This is so that if you add any paint or additional medium to the front of your project, the color will not bleed.   


So confession time: I had planned on using some distress paint on the front of my heart..but it so did not work out. I used non-acetone polish remover to take off the paint and accidentally removed some of my red alcohol ink which created some "gaps" in the overall coloring on the back.  So, I grabbed two more coordinating colors of alcohol inks and directly applied in small drop allowing the colors to spread.  I also used a paper towel to dab any extra ink...I love how it turned out!  

I wanted to add one of the Dragonfly Chipboard Embellishments to my heart. The easiest way to color is to add acrylic paint...here I used a few coats of Distress Paint in Cracked Pistachio.  
Once the paint was dry, I applied the chipboard directly to my Versa Mark pad and sprinkled with embossing powder that has bits of glitter embedded.  I removed the excess powder and set with my heat gun. 

The remainder of the letters I covered with patterned paper using Beacon Adhesive 3-in-1 Craft Glue.   We highly recommend a water based liquid adhesive so it doesn't yellow the acrylic...plus Beacon is just plain awesome!  I cut away excess paper with scissors and an exacto knife..and a little bit of sanding helps too! I followed by adding some fun embellishments from collection I used: Crate Paper's Hello Love.


I'm still here....

Ok, I guess I've pretty much proven I suck at blogging.  Seriously though I think everyone looks at Instagram. I think even Pinterest has died down.  Anyway, I'm going to type out what I want because..well its my blog LOL  

CHA or Creativation as its now called as come and gone and all the new pretty things are making their way into the stores. I was able to attend the show; it was a last minute decision and a roll of the dice with my  health after being in the hospital at the end of  December.  After a discussion with my husband, he convinced me to go be in my happy place with my scrappy tribe. Plus, if I died at least I'd be surrounded by pretty paper! LOL I ended up having a blast reconnecting with old friends as well as making new ones!! I got to hang out with the DT coordinator of Clear Scraps and I adore her. You know her as Pinky but I call her Cristal...mostly out of respect and that I like to annoy her! LOL  


I worked in the booth for Susan and Jim at Clear Scraps...I love these two!   They are just good people...and they treat the team like family. Susan even made us turkey sandwiches every day for lunch!  :)  We had a lot of fun!

Susan and Jim even gave me the flexibility to be with Teresa when she had make and takes so that allowed me to be able to float around the floor!  Here we are in the Xyron booth! I adore this lady...so excited for what she has going on this year!!  I'm excited to be teaching at her Vegas event in September...it's going to be a blast!  And did you see the new Fiskars products she has designed? I seriously wanted to steal the clear stamps LOL 

The night before I left my friend Jordan from SharBear Crafts texted me and asked if I was going to the show...we ended up being on the same flight! I got to hang out with Jordan and his mom the first day!  I've known him since he walked into the Chic Tags booth in Vegas at the summer show in 2013.   Jordan is an awesome person and I love that I can "talk shop" with him!  Check out his shop on Etsy...he always carries the latest releases!   


I also got to see one of my best friends that moved to AZ from IL three years ago. Lori and I worked at a LSS together and were partners in crime. I miss her so much!  We even got to have dinner together! During the winters, I threatened to come live with her LOL...especially since she refuses to move back to IL . We used to always go on shopping trips to Michaels or Hobby Lobby together...now I don't have anyone to enable :(  LOL

One of the fun things about attending the show is that you get to meet your "teammates" in person....I  was able to meet Kevin and Amber Crowell (owners of Simple Stories) as well as DT coordinator Layle Koncar!  Love love love Simple Stories!  It has been such a fun company to be a part of!!  I just adore their products as well as their employees! I was able to talk to one of the graphic designers and told her to call me if she ever doubts her talent....I was telling her all of the things she did right on  the collections LOL Any of my scrappy friends that know me can tell you I'm a paper lover and appreciate great design of patterns and colors!  


This is me, Cristal, and Susan during breakdown of the booth...we get a little stir crazy. I always hate seeing the show end although I'm happy to go home and see my family.  Phoenix was fun even though the weather was a little cool...I think people didn't respond to this location as well as Anaheim. Hopefully attendance will be up next year....I know it was cheaper for me to fly to Phoenix but I ended up having to rent a car plus park at the convention center. Anaheim was easier because you could just walk to the show..and plus Disney! LOL  


I came home with a cold but not knock down sick like I was afraid I'd be. I know a lot of my scrappy friends had colds or a stomach bug after getting home. Cristal and I joked that next year we are wearing hazmat suits with our Clear Scraps aprons over the top LOL  

If you attended the show, what did you think? If not, what new products are you favorite?
Have a great night!